|
Draw your stress away with a pencil & a pen. When was the last time you picked up a paintbrush or a colored pencil? We live in very challenging times. There are a range of strategies you can try to manage your anxiety and worries. What works is different for everyone, and it can take time to find the strategies that help you. But remember, if your anxiety is proving difficult to manage seek professional support. I have prepared a free fashion illustration tutorial for you. Come on, reach for your sketchbook. I hope when you start drawing the repetitive lace patterns you will slowly start to feel more relaxed.  Students who are enrolled in this course, have access to the video lessons to draw this illustration. You will need: 1. Bristol or other brand smooth paper. Media Applications: Smooth - pen and ink, mechanical pencil, air brush, marker Or X-Press It Blending Card is a great surface to use when drawing with Copic or alcohol markers. It has a smooth, silky surface and is 250 gsm to help reduce bleed through and to allow seamless blending. The paper is acid-free 2. Copic Ciao markers in shades: E11, E33, E25. 3. Black and light grey Pantone markers (you can use Copic markers) 4. Fine art line pen 0.1, 0.2mm and 0.4 mm 5. White gouache and a fine tip paint brush 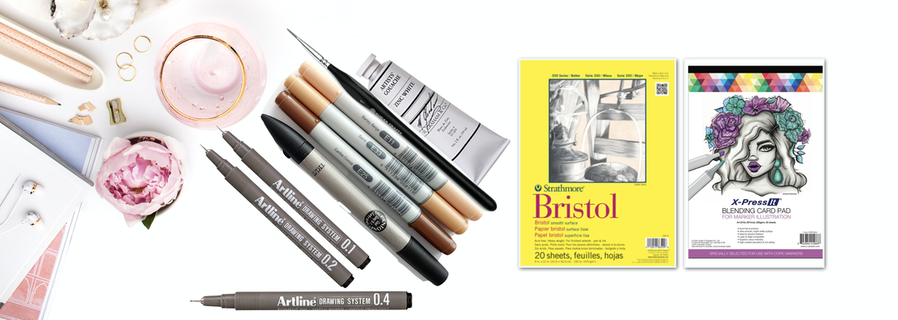 Step 1. Prepare your fashion figure template. For this tutorial my fashion figure is outlined with a waterproof fine art-line pen. 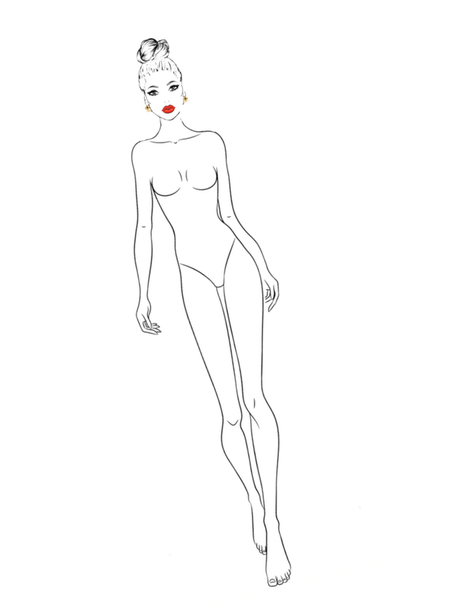 Step 2. Apply E11 shade as the first skin colour layer with a brush tip of the marker. Her figure has been fully rendered because she will be wearing a see through black lace dress. 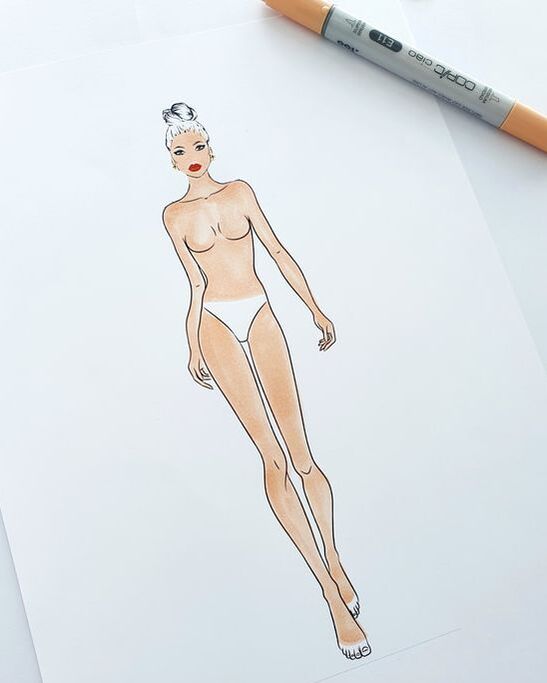 Step 3. Once I applied the first layer, I let it dry for a few seconds and then apply shadows with another layer of E11 and then E33. 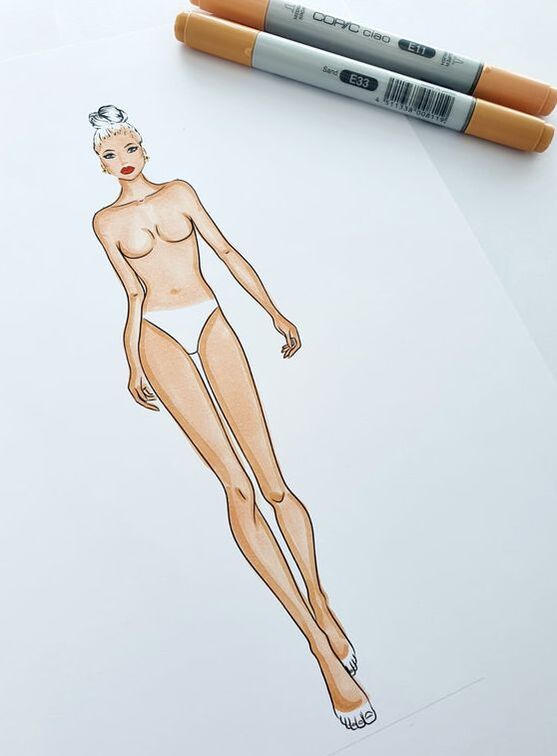 Step 4. Colouring hair. For this medium brown hair, I like to use the shade Caribe Cocoa E25. Let it dry and then reapply the colour in the areas of shading. 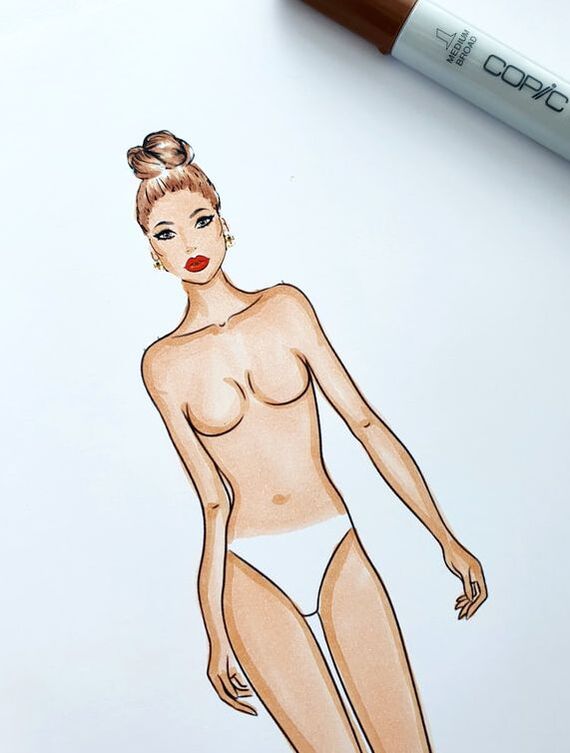 Step 5. Outline and colour her underwear. I am using a light grey Pantone marker for this illustration. 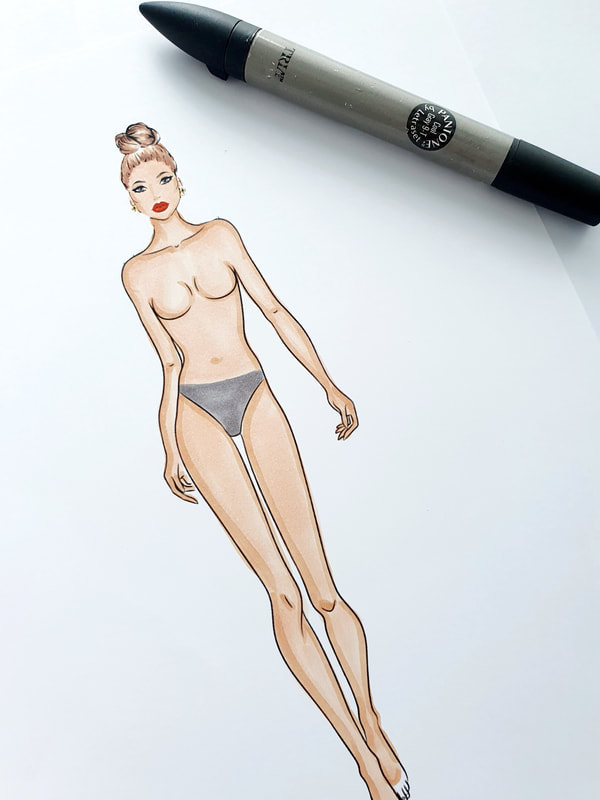 Step 6. When I sketch my designs, I start with a light pencil sketch. For this design I decided to draw two bows and a long lace gown with a beautiful floral-like pattern. 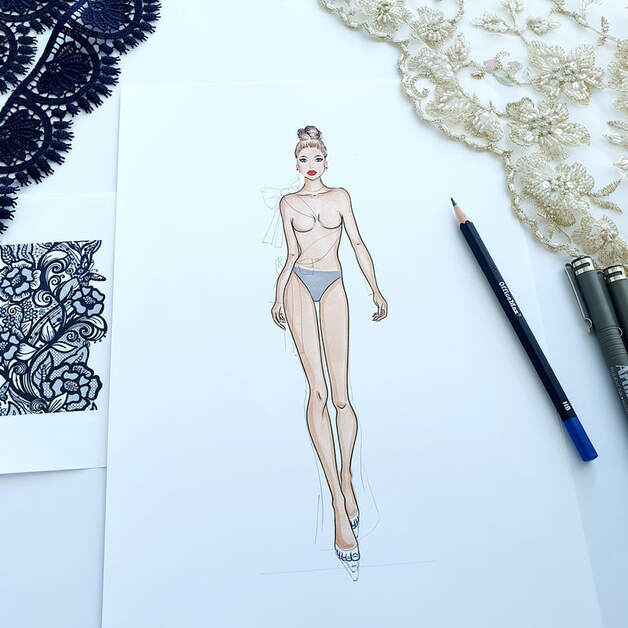 Step 7. In this step I will need waterproof fine art-line pens. I use different sizes- 0.1, 0.2 and 0.4 mm. The finest tip will be used to design and draw the very fine lace details. 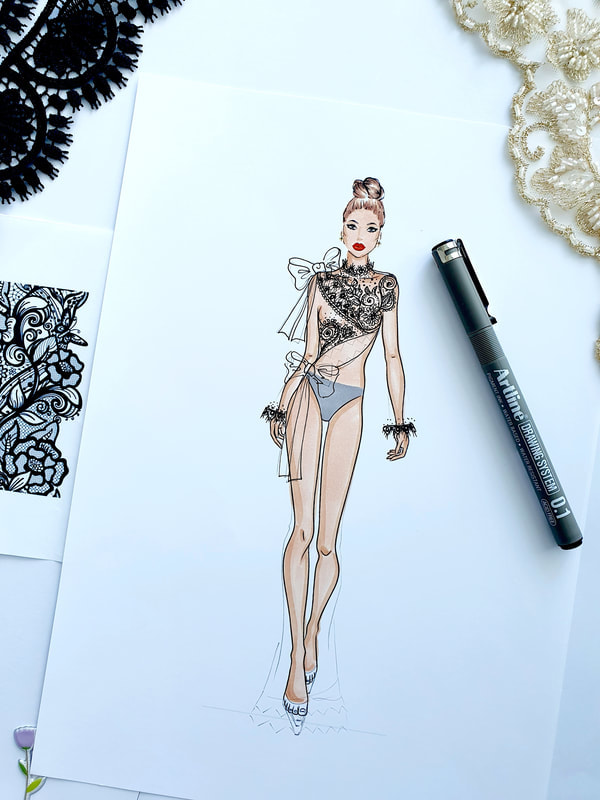 Step 8. Use your creativity to come up with a lace pattern or draw from the fabric/lace swatch. In this step I will be using an art-line pen, size 0.1mm. Step 9. Colour the shoes. Continue working on the dress. 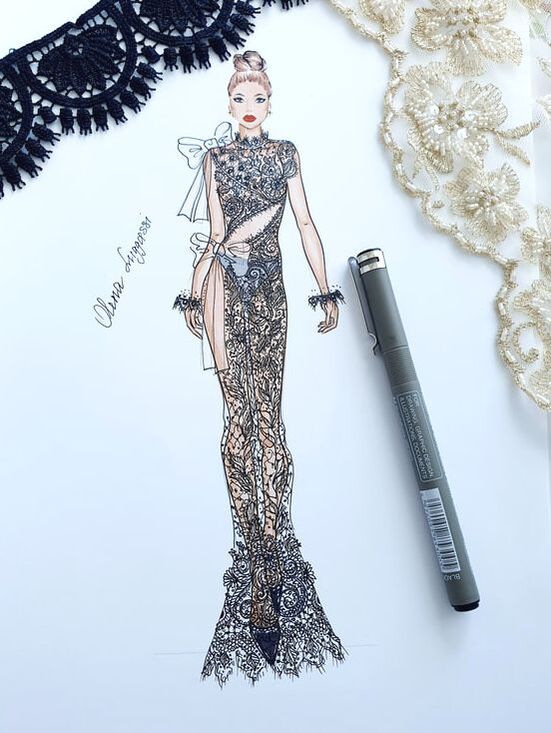 Step 10. Outline and render the bows. Apply shadows with a black marker to create the illusion of depth in the lace fabric. Step 11. The last and most exciting part of illustrating the design is embellishing it. I am applying a few Swarovski crystals to my finished illustration. 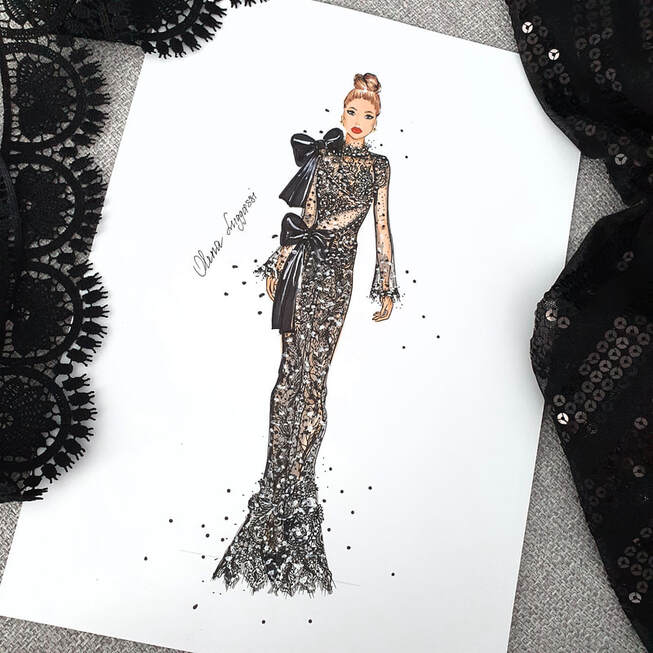 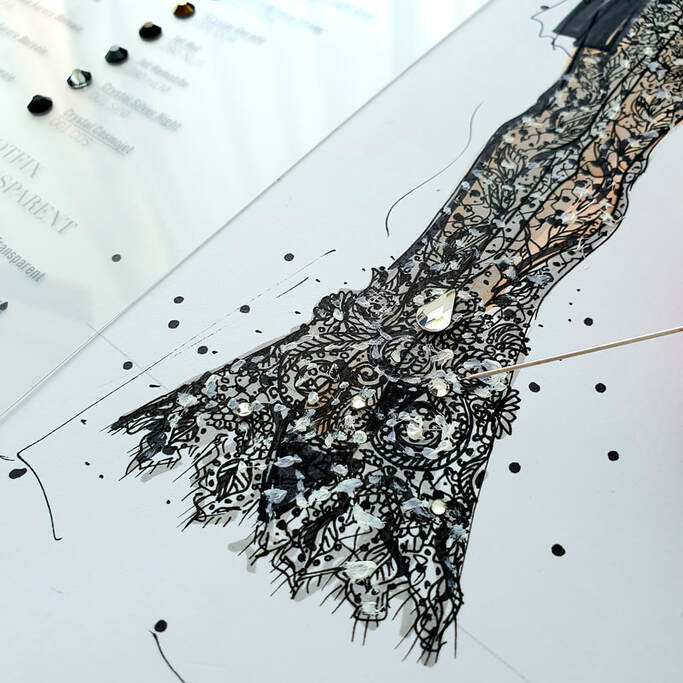 I hope you enjoyed drawing the lady in a black lace dress.
When you join my online course, you will have unlimited lifetime access to the material.
0 Comments
Leave a Reply. |
 RSS Feed